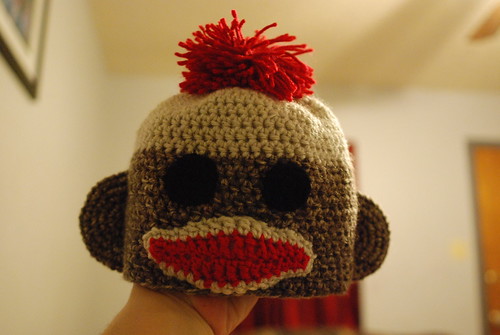
Welcome to my little celebration of Sock Monkey hats! The first installment will be the Basic Sock Monkey Beanie. This is just a beanie. If you would like ear flaps, please
go here for my tutorial on ear flaps!
So, on with the show!
Basic Sock Monkey beanie
You can use whatever yarn you please, of course, but my personal suggestion is Vanna's Choice in Taupe Mist and Linen. I think they look closest to an actual brown Rockford Red Heel sock. I buy mine at Hobby Lobby, but I have seen it at one of our local Walmarts (I live in AR, so there is one on just about every street corner) that has a large craft section. My usual Walmart does not carry it, so chances are, if your Walmart doesn't carry fabric, they probably won't have it.
A few notes:
I would like to suggest that you learn how to make a magic ring, if you don't know how already. It's tricky at first, but you will be able to tighten up the holes much better this way. There are tons of videos on youtube to help you.
I'm giving you a pattern to make a child-sized beanie. At the end, I'll give some suggestions for sizing it up or down, and if you ask me really nicely with a pretty please, maybe I'll write up a different size for you. The pattern is how I make a beanie - if you already have a tried and true basic beanie pattern you love, by all means, use it. Just make the first half of the rows in Linen and the second half in Taupe Mist. Then you can skip to the Parts section. For the rest of you....
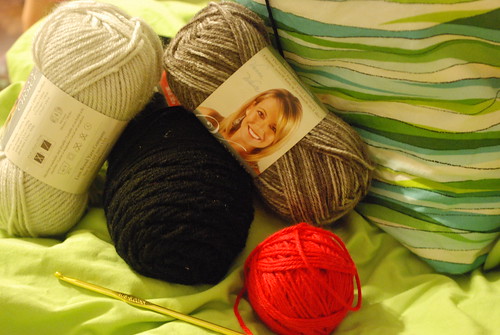
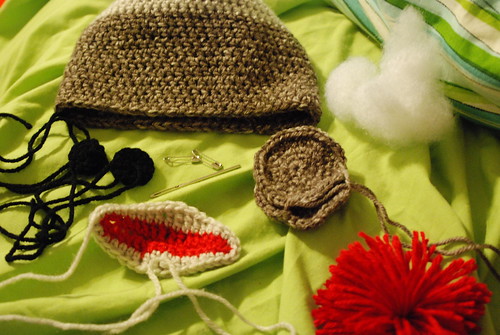
Supplies:
Vanna's Choice in Linen (or another worsted weight yarn in a beige shade)
Vanna's Choice in Taupe Mist (or another worsted weight yarn in brown)
Small amounts of worsted weight yarn in black and red
H hook
Yarn needle
Polyester fiberfill (very small amount)
Safety pins (optional)
Pompom maker (optional)
R1: With Linen, make a magic ring and hdc 10 times into the ring OR ch4, 10 hdc in 4th chain from hook. Sl st to join (10)
R2: ch1, 2 hdc in each hdc around, sl st in first hdc to join (20)
R3: ch1, *hdc, 2 hdc in next hdc, repeat from * around, sl st in first hdc to join (30)
R4: ch1, *hdc in next 2 hdc, 2 hdc in next hdc, repeat from * around, sl st in first hdc to join (40)
R5: ch1, *hdc in next 3 hdc, 2 hdc in next hdc, repeat from * around, sl st in first hdc to join (50)
R6: ch1, *hdc in next 4 hdc, 2 hdc in next hdc, repeat from * around, sl st in first hdc to join (60)
R7-10: ch1. hdc in each hdc around, sl st in first hdc to join (60)
R11: ch1. hcd in each hdc around, sl st in first hdc to join, fasten off (60)
R12: Join with Taupe Mist, ch1, then hdc in each hdc around, sl st in first hdc to join (60)
R13-21: ch1, then hdc in each hdc around, sl st in first hdc to join (60)
R22: ch1, then hcd in each hdc around, sl st in first hdc to join, fasten off (60)
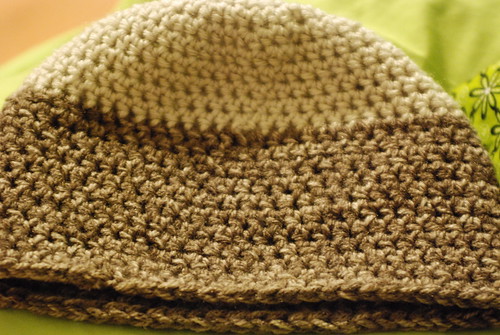
Beanie is complete. Weave in your ends. I like my beanies to cover the forehead, but if you feel that this beanie has too many rows for your liking, I would reduce the number of rows you make in Linen. You need at least 11 rows of Taupe Mist for the face to fit.
Time to make the monkey parts!
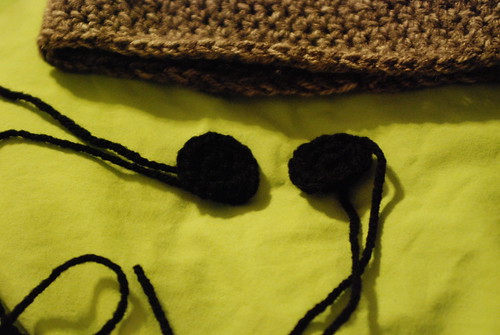
Eyes (make 2)
R1: In black, make a magic ring and sc 6 times into the ring OR ch4, 6 sc in 4th ch from hook. sl st to join (6)
R2: 2 sc in each sc around. sl st to join. Fasten off, leaving a long tail for stitching (12)
Ears (make 2)
R1: In Taupe Mist, make a magic ring and sc 8 times into the ring OR ch 4, 8 sc in 4th ch from hook. sl st to join (8)
R2: 2 sc in each sc around. sl st to join. (16)
R3: *sc in next sc, 2 sc in next sc. Repeat from * around. sl st to join. (24)
R4: *sc in next 2 sc, 2 sc in next sc. Repeat from * around. sl st to join (32)
R5: *sc in next 3 sc, 2 sc in next sc. Repeat from * around. sl st to join. Fasten off, leaving a long tail for stitching (40)
 Mouth
The first row of the mouth is worked on both sides of the chain - when you get to the end, you will work on the bottom loops of the chain to work back towards the beginning. It's hard for me to explain, so if this isn't clear, let me know so I can try to clarify!
Mouth
The first row of the mouth is worked on both sides of the chain - when you get to the end, you will work on the bottom loops of the chain to work back towards the beginning. It's hard for me to explain, so if this isn't clear, let me know so I can try to clarify!
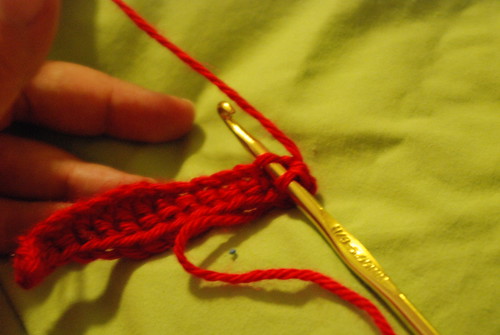
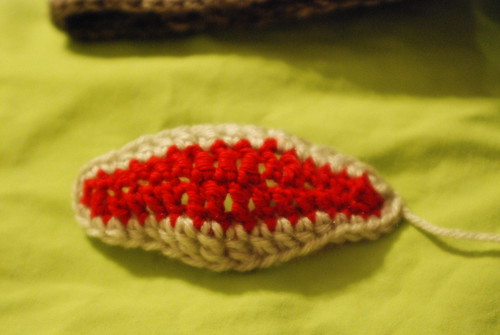
In red, ch 16
R1: Starting with 2nd ch from hook - sc, sc, hdc, hdc, dc, dc, tc, tc, tc, dc, dc, hdc, hdc, sc, 3sc (beginning to work on the bottom from here) sc, hdc, hdc, dc, dc, tc, tc, tc, dc, dc, hdc, hdc, sc, sc. join with first sc with a sl st and finish off
Can you see what I'm doing here? You just work in the loops at the bottom of the chain.
R2: Join with Linen - sc, sc, sc, hdc, hdc, dc, dc, tc, tc, tc, dc, dc, hdc, hdc, sc, sc, 3sc, sc, sc, hdc, hdc, dc, dc, tc, tc, tc, dc, dc, hdc, hdc, sc, sc, sc, sc, join with sl st to first sc, finish off, leaving a long tail for stitching.
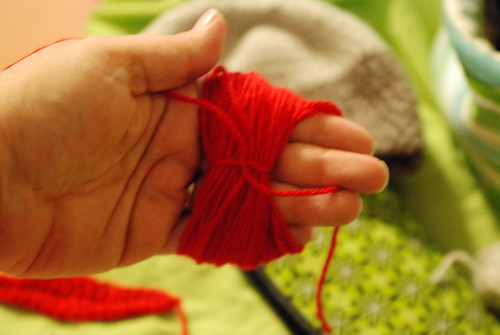
Pom Pom
If you have a pom pom maker, use it! I think they make the most uniform-looking pom poms, but if you don't have one, don't fear! Here is a quick run down on how to make one with just yarn, scissors and your hands, if you have nothing else.
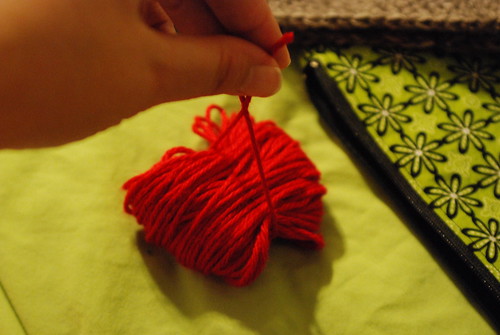
Take your red yarn and wrap it around the fingers of your hand, not too tightly, about 80-100 times. The more times you wrap, the fuller the pom pom. Cut about a 10-12 inch length of yarn. Slip it between your hand and the yarn and tie it tight.
(Kind of tricky one-handed, so you might need some help)
Pull the yarn off of your fingers and then wrap the tying piece around the middle of the whole
bundle.
Cut the loops and shape.
Assembly:
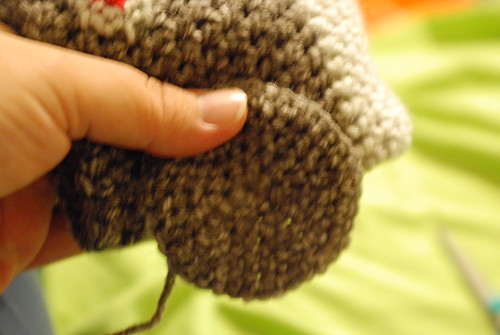
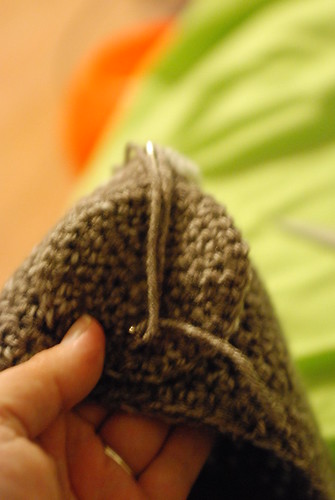
Fold the hat in half, with the joining seam running up the back. (Do you know how to make your seam almost invisible? If you need me to give a tip, let me know!)
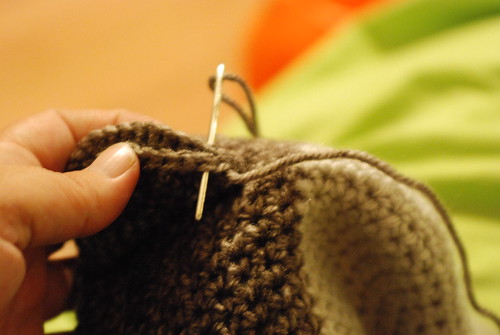
Take an ear, line up the diameter of the circle and the side of the hat and safety pin it in place. Stitch to the beanie up the middle of the ear. Fold the ear in half and whip stitch around the edge to close it up. Fasten off and repeat for the other ear.
Line up the ear
Stitch up the middle (where the yarn is laying)
Fold ears and sew closed
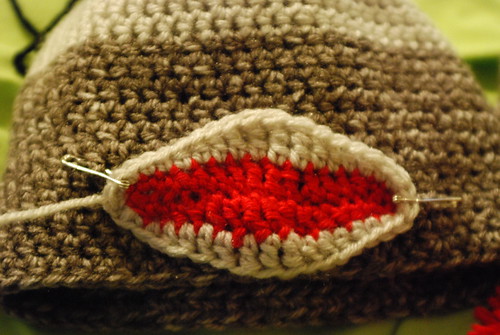
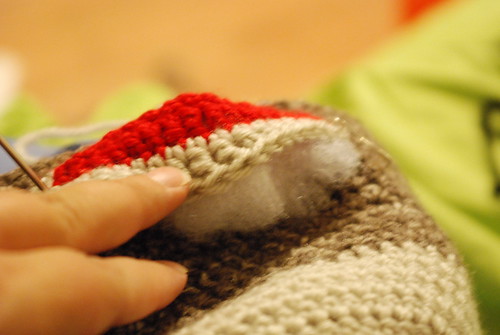
Line up the bottom of the mouth close to the brim of the hat. Pin the sides of the mouth in place with safety pins to keep it from traveling while you stitch it to the beanie. Begin at one corner of the mouth and stitch the bottom on. Stuff the mouth - lightly.... if you overstuff, it will show through the stitches - and finish stitching the mouth on.
Pin mouth in place
Don't overstuff!
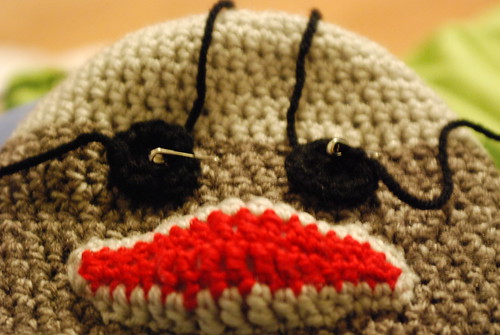
Eyes - pin them in place and just stitch them on!
Sew the pompom on top and you are done! Slip it on a cute little head and giggle at the cuteness!
Sorry, no picture of this monkey on a cute little head. They are in bed. =)
Next up will be the Punk Monkey. Hopefully I'll get that up tomorrow night.
Pattern is for personal use only. Please contact me if you have any questions!
Shamelessly self-promoting here: