I've seen mentions of them crop up recently online. I'm not sure if they're making a comeback or if they have always been a tween staple and my friends' kids are just now reaching that age for me to notice again. Either way, I've been thinking about trying to teach myself so that I can eventually teach Olivia.
Friday, the stars aligned and in one day I spontaneously bought an assorted pack of embroidery floss and had Olivia give me a reason to teach myself. So I did. It didn't click right away, but it did eventually click. I even got all cocky and told Olivia I'd teach her once I figured it out. And I did.
But for her, I didn't use floss. Floss just seemed a little too fine for her 6 (almost 7)-year-old fingers. I used yarn for her. I don't know why I never thought of yarn before. It's perfect for younger kids. It works up the same, it just makes a chunkier bracelet.
I think this is the perfect "gateway" craft for younger kids. I don't know that Olivia's quite ready to manage a crochet hook and yarn... her fingers aren't quite dexterous enough. But this will help so much in that department. I think after she does this for a while, teaching her how to crochet will be much, much easier.
Want to learn how (or need a refresher course?)... here we go...
You will need:
approx. 3 feet each of two different colors of yarn
a safety pin and pillow OR a clipboard
scissors
To begin, holding both strands of yarn together, fold it in half and make a knot, leaving a small loop above the knot (this will be for fastening the bracelet)
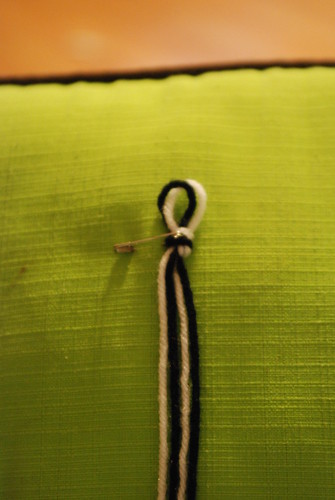
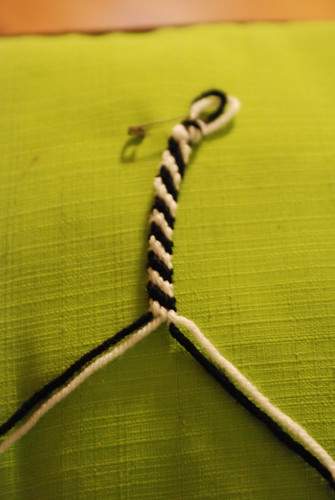
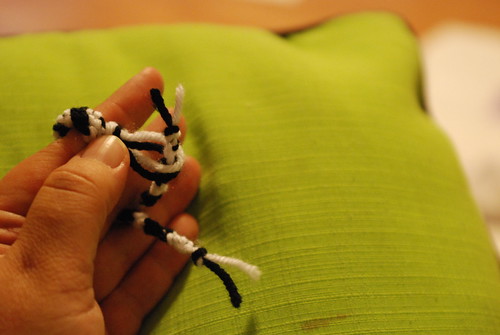
Secure the knot to a pillow with a safety pin or tuck the knot under the clip on a clipboard. Arrange the strands in the pattern you would like your stripes. Above, I chose black, white, black, white (as Olivia would say, an a-b pattern).
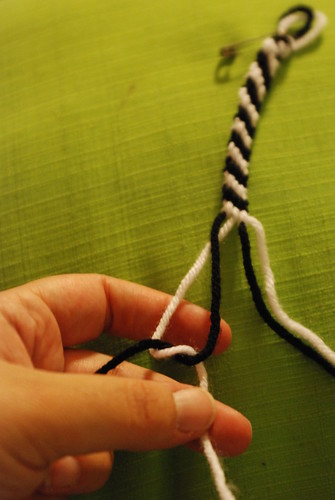
The strand farthest to the left is your working strand, the one that you will make the knots on all the other strands. Pull the second strand taught and bring the working strand over the top of it like so:
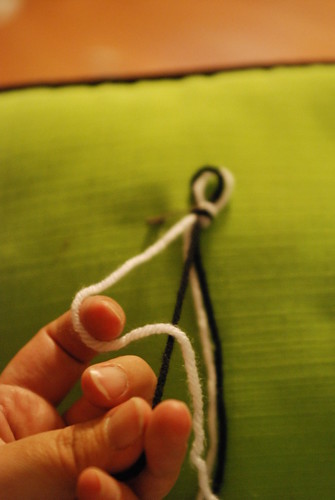
Wrap your working yarn under and through the hole and pull the working strand up to create the knot. This is a forward knot.
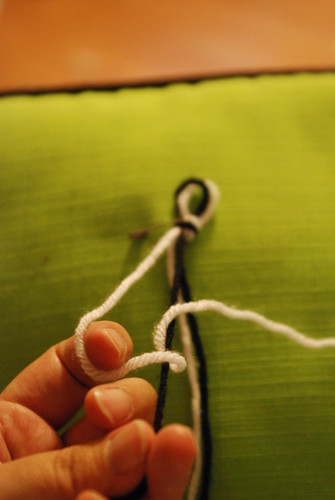
There are other types of knots, but this is the basic knot and the only one I'll cover (because I don't know the rest yet!). Repeat this again on the same strand. You need to make 2 knots per strand or your bracelet will be all kinky. After making two knots, move the strand you use used off to the left and move on to your third strand:

Make two knots, move to the fourth strand:
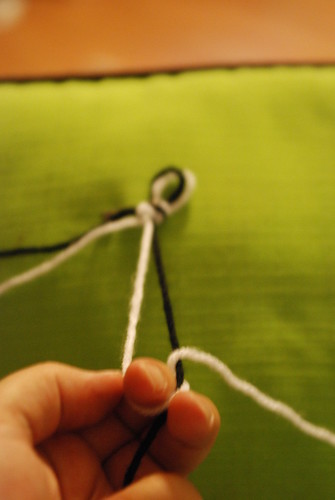
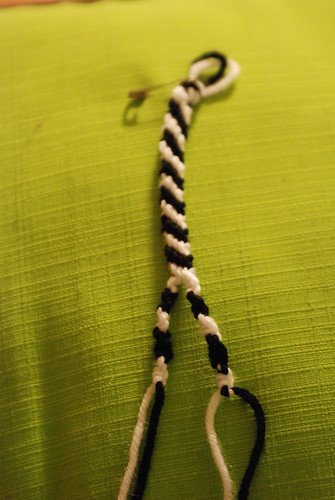
Your first row is complete! Your working strand should be the last strand now. You begin again, the farthest to the left again being your working strand. Continue in this manner until the bracelet is your desired length.
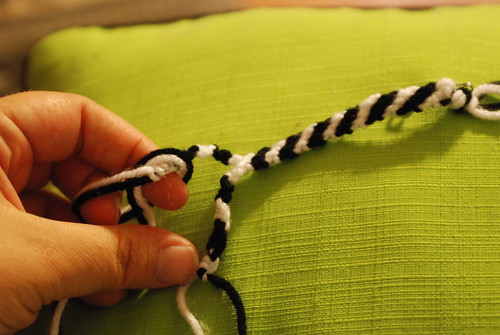
When you are satisfied with the length, separate your strands in two like I have above.
Then I knotted the two strands in each section until I had two tails long enough to tie together (I just alternated the colors making forward knots)...
Secure the ends by knotting the ends like so (I hope this is clear....)
To secure on your wrist, you will pull one tail through the loop on the other end.
Then tie the tails together. Voila! A friendship bracelet made of yarn...
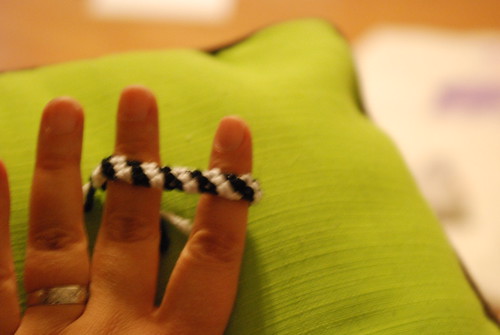
Yes, it looks tiny. My kiddos are asleep right now, but I would bet money that it fits. They have such tiny wrists. We're going to keep making more until she's pretty independent with it and then I'll move in for the kill and break out the crochet hook! So exciting!
Linked to:

thanks so much for sharing , my daughter came home from school and said mum do you know how to make friendship bracelets !! now i do !
ReplyDeleteYour very welcome! We had lots of fun making them. :)
ReplyDelete