Last year, I made fabric Easter baskets for the girls. The intention was to have something special they'd use forever. But they turned out much, much, MUCH too big to be really practical. And I kinda have fallen out of love with the color scheme. And somehow some fabric scraps and my in-progress Babette blanket seem to have taken up residence in them. I could have just taken the stuff out of them for a few days to use them, but I just really wanted to make them something else. I had seen a few things that I had considered making that would work or could be adapted to work, but nothing that I really was happy with.
So I just sat down and made it up using bits and pieces I've learned in all my adventures crocheting.
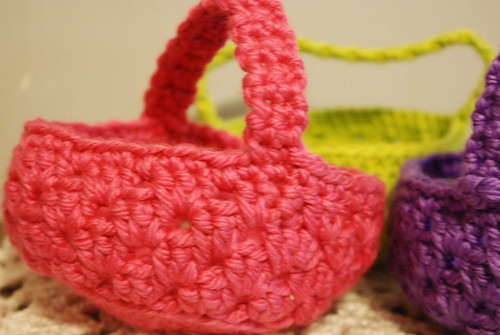
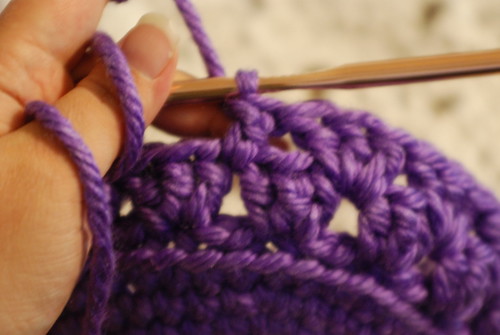
It only took me about 2 hours from start to finish, so I thought it would be something fun to share for anyone who was thinking about crocheting an Easter basket, but had procrastinated. I made all three baskets for my girls in under 24 hours. I used super bulky weight yarn (on the label of most brands is a picture of a skein of yarn with a number on it... you're looking for a 6), which worked great for two reasons: It worked up super fast and it makes the basket a little bit stiffer than if I had used worsted weight or even bulky. And nobody wants a floppy basket.
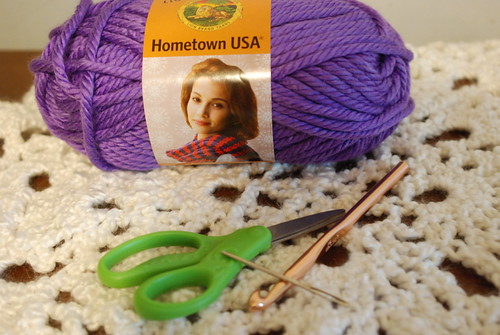
Yes, those are preschool scissors. Shush.
Supplies:
- 1 skein super bulky weight yarn (approx. 81 yards) *
- N hook **
- Yarn needle
** If you generally crochet pretty loose, you may want to go down a size. You need your stitches to be tight to avoid having a really floppy basket.
Row 1) 6 sc in a magic ring and join with sl st in first sc OR ch 4 and join in the 4th ch from hook and 6 sc in the loop and join with sl st in first sc (6sc)
Row 2) ch 1, 2 sc in each sc around, join in first sc with sl st (12 sc)
Row 3) ch 1, *sc, 2 sc in next sc* repeat around, join in first sc with sl st (18 sc)
Row 4) ch 1, *sc x 2, 2 sc in next* repeat around, join in first sc with sl st (24 sc)
Row 5) ch 1, *sc x 3, 2 sc in next* repeat around, join in first sc with sl st (30 sc)
Row 6) ch 1, *sc x 4, 2 sc in next* repeat around, join in first sc with sl st (36 sc)
Row 7) ch 1, *sc x 5, 2 sc in next* repeat around, join in first sc with sl st (42 sc)
Row 8) ch 1, *sc x 6, 2 sc in next* repeat around, join in first sc with sl st (48 sc)
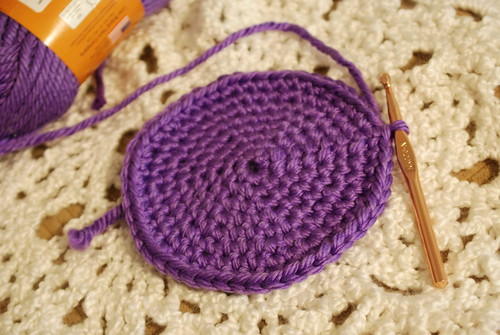
Row 9) ch 1, sl st in BACK LOOPS ONLY around, join in first sl st with sl st (48 sl st) (this puts a more definite break between the base and the sides)

Now we will begin the sides of the basket.
Row 10) ch 3, 2 dc in same stitch, skip 2, *3 dc in same stitch, skip 2* repeat around, join in the top of the ch 3 with sl st (16 dc clusters)

Row 11) sl st to the space between the first and second dc cluster in previous row, ch 3, 2 dc in the sp, *3 dc in next dc cluster space* repeat around, join in the top of the ch 3 with sl st (16 dc clusters)
Row 12 -13) Repeat row 11
Row 14) ch 1, * sc 2, sc in space between dc clusters* repeat around, join in first sc with sl st (48 sc)
Handle) ch 1, sc 2, ch1 and turn - repeat until you reach your desired length or are close to running out of yarn. Attach handle to the other side by either finishing off and sewing it on or you can slip stitch into the stitches where you want it attached. I don't know how to really explain this, so if you know what I'm talking about, great, if not... it's just as easy to sew it on.
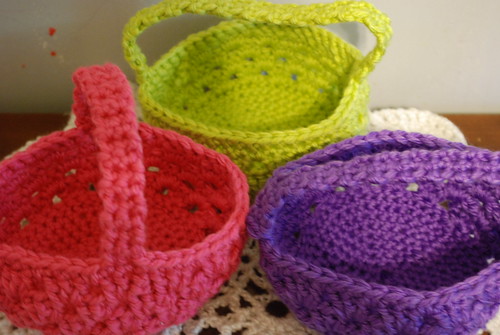
Weave in your tails, stuff with Easter grass (or green tissue paper... I prefer that myself) and candy and eggs!
I have plans to embellish these a little with probably some felt roses and I need to put name tags on them because Iz and Zo need to take theirs to school Wednesday for their school egg hunt.
I just found your blog and am your newest follower. Thanks for sharing this fun project. These little baskets are crazy cute!
ReplyDeleteToo cute! I can't wait to try these. I already have baskets for my kids, but these would be perfect to make for my nephews! Thanks for sharing :)
ReplyDeleteThese baskets are adorable! Thank you for showing us how to make them...I'm going to give it a whirl! I really like your blog, too. I'll be following!
ReplyDeletethose are adorable!
ReplyDeleteI am having a giveaway on my blog. $40 store credit to get any vinyl decal from Urban Walls.Just leave me a comment telling me which is your favorite design to win.
http://houseonashwelllane.blogspot.com/2011/04/40-store-credit-from-urban-walls-to-get.html
I love these! I must share them at Tangle Happy. Thanks for sharing this. :)
ReplyDeleteSuper cute ~ coming over to your blog from Tangle Happy. Your daughters are beautiful and just love the Easter dresses! Thanks for the share!
ReplyDeleteI am a new Follower and I love this basket patter....not just for Easter, either. I am planning on making one to day!
ReplyDeleteThanks!
I'm having a problem. Do you know how to make the basket stand up mine keeps falling down.
ReplyDeleteIt will be floppy... mine is only as stiff as it is because I crochet very tight. You could thread some wire through the handle if you want that to stand up and stuff the basket with tissue or Easter grass.
DeleteI found these on pinterest and couldn't wait to make them. I ordered the extact type of yarn and I have the right crochet needle but I ran out of yarn before I even got the 13th row done. Did I do something wrong?
ReplyDeleteJust made one of these out of the Red Heart Super Saver yarn, I'll be making a few more for my daughters playgroup. Thanks for the simple pattern.
ReplyDeleteIm in the middle of this project and I love it. However, I used same pattern but with bernat baby blanket super bulky 6 yarns in yellow and white. Size 9mm/US M. I did a 2nd strand in both with a small baby yarn in pink. Going from the single crochets into the doubles that first round got really tricky and i swear i almost stabbed myself with my needle about 50 times... which shouldn't be possible... its dull. lol. BUT--- i will be adding the handle soon, and I have some artificial flowers I will use to embellish the entire top row. Ill post another reply when i have a photo to show off.
ReplyDeleteThanks for the easy pattern. This was the first project ive done reading an actual pattern. (I usually just go along with youtube videos.) and it was easy to figure out. thank you!!!!!
I'd love to see the finished basket! I'm so glad you like the pattern - I'm honored that it was your first! =)
DeleteCan you share how you figured out the handle instructions....
DeletePlease let me know, ASAP. THANKS
Well this isnt completely finished, as my flowers are at home, and I am at work. (gotta love downtime.) But here is the jist of it.
ReplyDeletehttp://img.photobucket.com/albums/v290/tattoodmary/basket.jpg
Kinda blurry but when its completely finished I should be near my camera.
Thanks again!
I love it! Looks like a first Easter... hope your little one has a ball =)
DeleteIt is indeed, Shes almost 7 months old. Figure start the traditions and nice handmade items now so she has them down the road for her kids. I love heirloom bits :-)
DeleteHi Jennifer!! I just finished a blog post on my rendition of this super cute and incredibly simple pattern! Thank you for posting it and sharing it with all of us! I hope you enjoy the post!!
ReplyDeletehttp://www.thehookupcrochet.com/easter-basket-project/
Keep Hooking!!
Stephanie
The Hook Up
No Facebook link to join your site?
ReplyDeleteI made eight of these in THREE days! I love your pattern. I'm sharing on your blog and will be tagging back to you :)
ReplyDeletehttp://pigtailsandpitbulls.blogspot.com