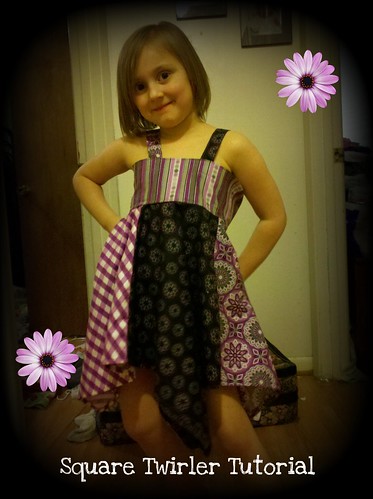
It was suggested that I make a tutorial for my handkerchief hem dress and since my girls want more, I will be happy to oblige. =) This dress was such a hit with friends and family and even strangers. Please excuse the dark pictures.... the lighting in my room is horrible for pictures.
This is easily adapted for any size... it just takes some measurements and a little math, but I'll try to take it easy on you. I was this close to being a math major, so forgive me if I go a little crazy.
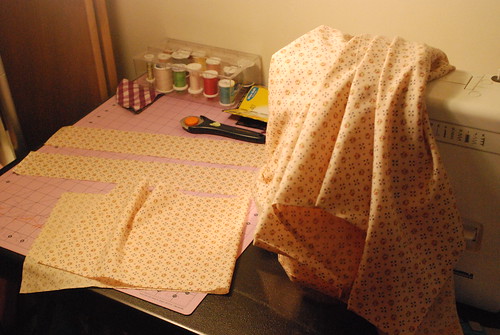
To make a patchwork version, you'll need about 5 coordinating fat quarters. You can find bundles of coordinating fat quarters at the fabric store, usually around $10 for 5. You can use just yardage for a single color/print and, depending on length, you might get away with a yard for little ones, up to two yards for bigger girls. This tutorial will be all in one fabric, but I'll explain the patchwork along the way as well.
You'll need a two measurements: the chest and the length of the dress from just under the arm pit. Remember, the corners of the hem will be much longer than the middle of the side of the square, so make sure you are measuring where you want the shortest part to fall... you don't want your little girl showing off her bloomers when the wind blows.
Get out your calculator and a pen and paper to record your answers. =)
Take your chest measurement and add 1" for ease. Example: 24" + 1" = 25" Write down this number for future reference. We'll call it the bodice width.
Now, for yardage people, you can just cut one strip and sew one seam, so add 1/2" for seam allowance (assuming a 1/4" seam, adjust as needed if you prefer a different seam allowance). Example: 24" + 1" + .5" = 25.5" For fat quarter people, you will be cutting a front and a back, so your math is a little trickier. You will take your bodice width, divide by 2 and add 1/2" to get the width of each piece. Example: (25" / 2 = 12.5") + .5" = 13" and you will cut 2.
We're not cutting yet! Hold your horses... there's still some more math.
For the skirt, we will be cutting a circle into the square and we need the radius, or length from the center of the circle to the edge of the circle. This sounds painful, but if you have a calculator, you'll be OK. =) Take the bodice width and divide it by 6.28. Why 6.28? Just trust me, it's a geometry thing. Example: 25" / 6.28" = 3.98" rounded up to the nearest quarter-inch is 4" Write that down.
For simplicity sake, we are also going to use that measurement as the height of our bodice. You can make it shorter or taller, but it involves more math and you're on your own. =)
Let's go back to the bodice. We know how wide to cut the pieces, now we need to figure out how tall. The bodice is double layered, so we will take our radius and double it plus add 1". Example: 4 x 2 + 1 = 9". My bodice piece cut from yardage would be 25.5" x 9" (or 2 pieces 13" x 9" using fat quarters).
We're almost done with the math and can get to the fun stuff. I promise.
Now we will take the length of the dress. Take your desired length, double it, add 1" for seams (that allows for 1/4" hems, adjust as needed). Example: 22" x 2 +1" = 45" If you need longer than 22", you might need to make your bodice taller because most cotton quilting fabric comes in 45" widths. Or try to find wider fabric. Whatever you need to do. =)
If you are using fat quarters, the biggest square you're going to come up with is 35.5 x 35.5. Just so you know. You'll use 4 of the fat quarters for just the skirt. Take your desired length, add 1" for seams and hems and cut a square from each quarter. Then sew them together into a bigger square. So, if you have a little one and only want a 15" length, cut four 16" squares. Make sense? It actually gives you about 1/4 inch wiggle room (half inch for hem, 1/4 inch for seams, but we're going the full inch).
Cut 2 straps, 3" by 12". They will be too long, but better safe than sorry. You can cut them to size when you are pinning them in place later.
Alright. Now we have our big square, our bodice piece, and our straps. Let's get to work.
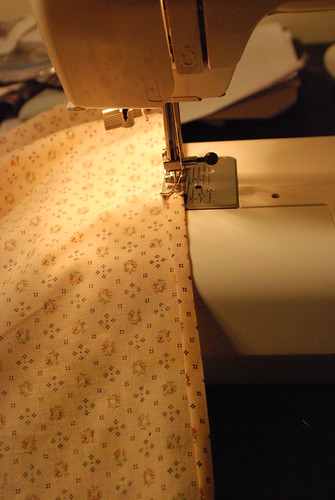
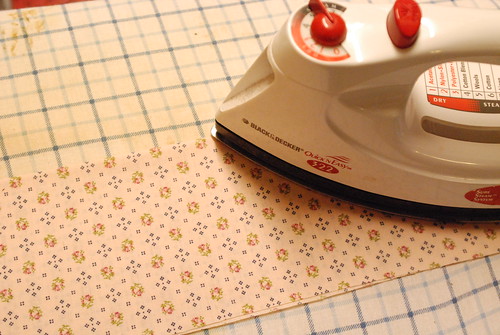
I know that normally you hem at the end of a project, but I think it's easier in this case to just go ahead and hem the square before moving on. I allowed for a 1/4" hem.
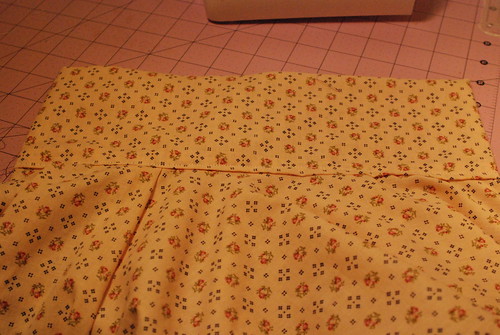
Now we'll cut the circle into the square. Fold your square in half and then in half again to form a smaller square. The corner where there are no edges, just folds, is what you are looking for.
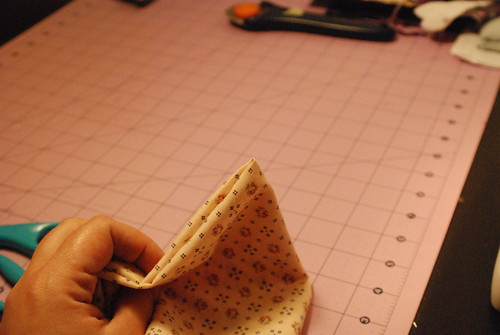
Using your radius number, make marks that distance coming out from that corner.

I didn't have a pencil handy, so I just used pins. I don't recommend it... mine came out just a tad bigger than I needed, but I made it work. Using these marks, cut out your circle. Set your skirt aside for a minute while we make the bodice.
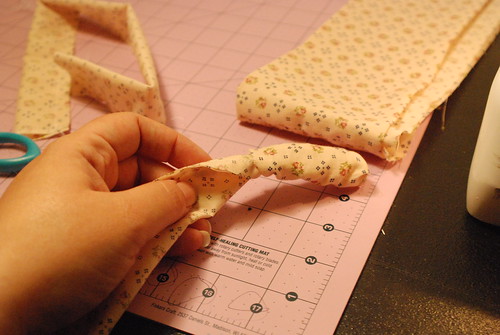
Sew your one or two seams for your bodice, making it into a band.
Fold it in half, wrong sides together, and press.

Fold one edge in 1/2 inch (wrong sides together) and press. Go get your skirt.

Pin the skirt to the unfolded edge of the bodice, right sides together. If your skirt is pieced, try to match up seams. Sew them together using a 1/2" seam allowance.

Flip the dress inside out and pin the folded edge of the bodice to the skirt, encasing the raw edges, and sew.
You end up topstitching the front at the same time... I thought this was so cool the first time I did it. Try to sew a straighter line than I did, too. I was being rushed and it came out a little wonky.
Fold your straps in half length-wise and sew. Turn inside out and press.
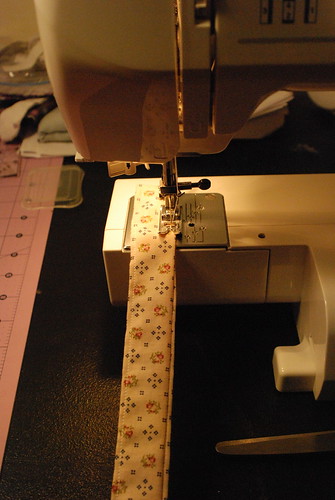
Top-stitch the edges of the straps.... this makes it look neater and keeps it from getting all bunchy.
Pin the straps in place. I try the dress on my kid to make sure I have the placement right and can adjust the length at that time.

With the straps pinned in place, top stitch along the top of the bodice, setting the straps in place. Reinforce the straps with another row of stitches about an inch below. I forgot to take a picture of that. If the line of stitches bothers you, cover it up with a decorative button, but I don't find it that noticeable.
For this dress, I only attached the straps to the front and tie them halter-style. It works best for Olivia because she's so much thinner than her sisters and I want to make sure they can all wear it.

And, that's it. A square hem twirly sundress for your darling! If you make one, please send me a picture or link to it in the comments. I would love to see it!

That was her best twirl, being barefoot and all. And yes, it is February, but I assure you, it was pretty warm today and she was only slightly chilly.

Thank you, Jennifer!!! I can't wait to try it! <3
ReplyDeleteThanks for the wonderful tutorial! Turned out sooo cute! We loved having you link up to our "Strut Your Stuff Saturday." We hope you'll be back! -The Sisters
ReplyDeleteIt turned out so cute...and great tutorial! Thanks for sharing!
ReplyDeleteThank you for sharing!!! I've got a secret, though...I went through college trying to take as little math as possible! I'm pinning you!
ReplyDelete